Email Setup
Email Synchronization and Built-in HIPAA-Compliant Emails
Built into MerusCase is the ability to send HIPAA-compliant emails. Every MerusCase user is assigned a special meruscase.net email account which is formatted as user+#####@meruscase.net. All emails sent from this email address will prompt the recipient to login to a free MerusCase Email-only account in order to access any email attachments.
However, not all email interactions or documents are required to be HIPAA-compliant, so MerusCase also offers the ability to link other email addresses to MerusCase through email synchronization. This means that you can have access to your emails in MerusCase, which opens up unique functionality, such as linking emails to cases. Additionally, any emails sent from a synchronized email account will not be HIPAA-compliant, so any recipient of these emails will receive them as a standard email.
The option to set up shared accounts in MerusCase is also available. If a shared account is added to MerusCase, all users firmwide will have access to that email account. Many MerusCase clients set up a shared account for Fax-to-Email accounts and/or [email protected] accounts.
Incoming (User & Shared)
When setting up email accounts, either individual or shared, you have the ability to add as many incoming email accounts as you like. Email addresses added to the Incoming Email Accounts tab (Email In on mobile or small screens) will be directed to your Inbox. Email addresses added to the Shared Incoming tab (Shared In on mobile or small screens), on the other hand, will be available as individual tabs under the Messages drop-down menu. Setting up incoming email accounts will allow you to receive emails in MerusCase. To send emails from a particular email address, an outbound email account must also be set up.
To set up your incoming email account, follow the steps below.
-
Click on Tools & Settings on the top right-hand corner of the screen.
-
Click Email Setup to open the Incoming Email Accounts tab.
-
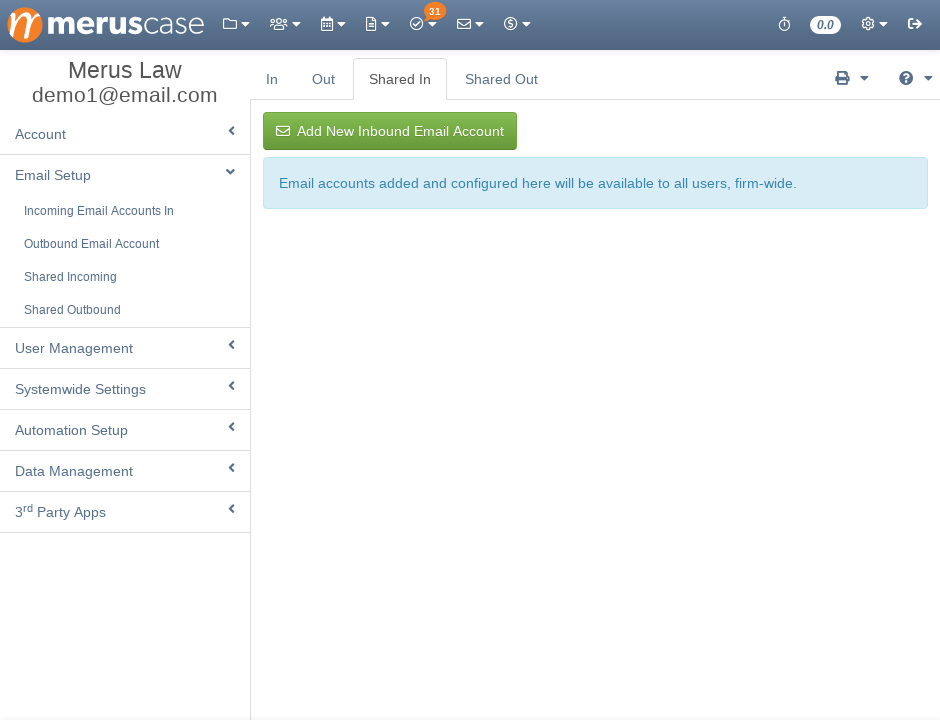
To add a Shared Incoming email account instead, click on the Shared Incoming tab.
-
Click Add New Inbound Email Account to add a new email address.
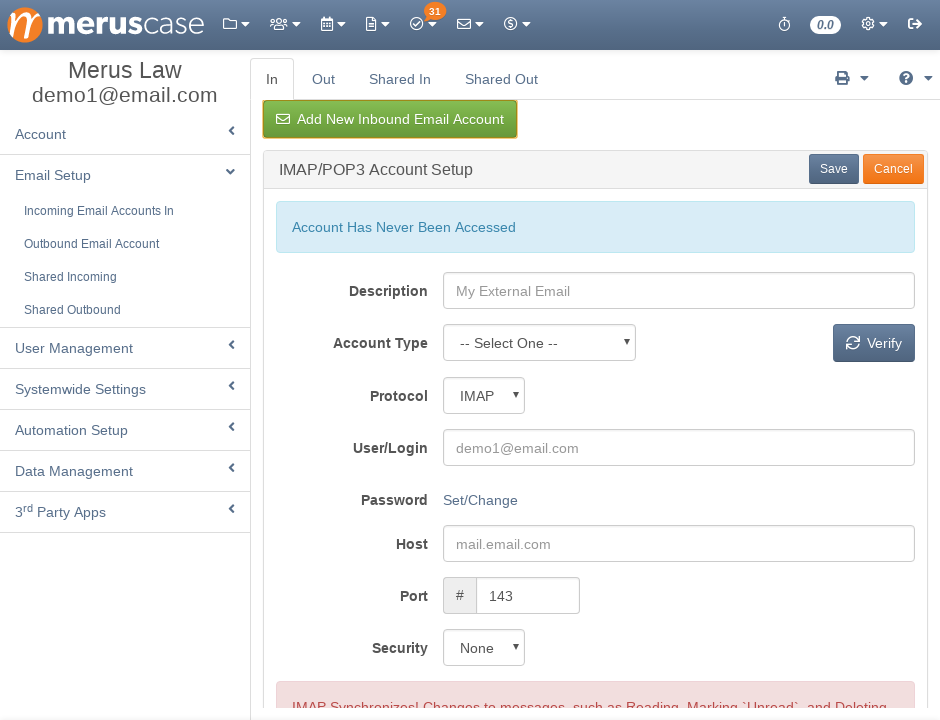
Edit, Verify & Save
-
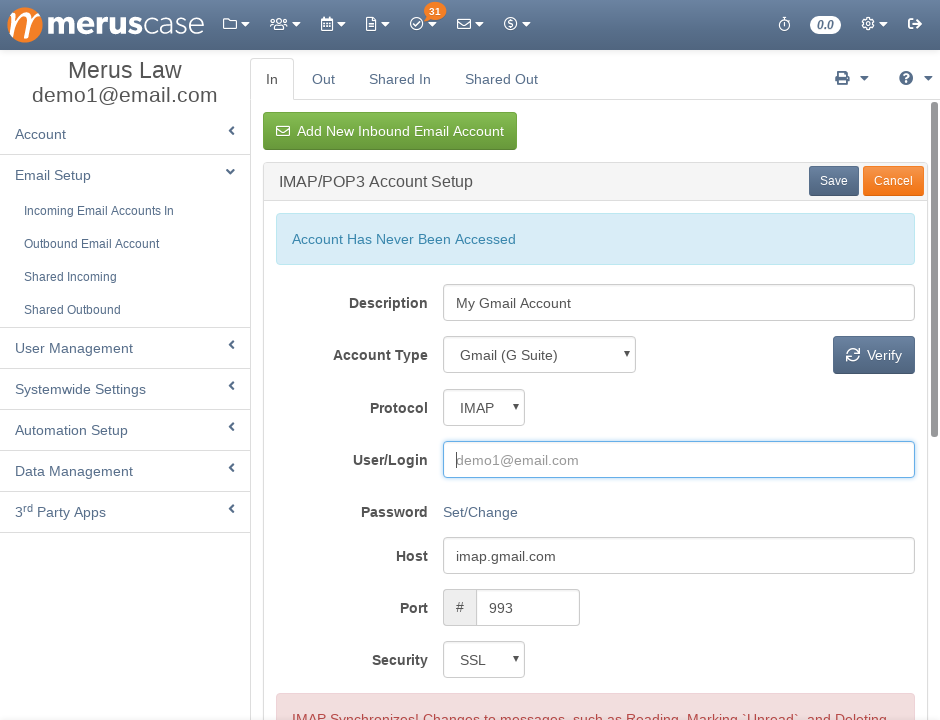
Enter the info and credentials for the email account you’re syncing.
-
Description: Your identifier for the email address.
-
Account Type: This will fill in default settings for Port and Security; these may or may not need to be adjusted.
-
Protocol: Both IMAP and POP3 are available. Both of these protocols are methods used to sync your Merus inbox with your existing email account (Gmail, Outlook, etc.); however, a POP3 setup doesn’t support usage on multiple devices and often leaves users with lost messages. On the other hand, an IMAP setup does support multiple devices, which means that when you read, delete, or edit an email message in your Merus inbox, those changes will be reflected when you access your email elsewhere. It is strongly suggested that all users choose IMAP over POP3 for a better user experience.
-
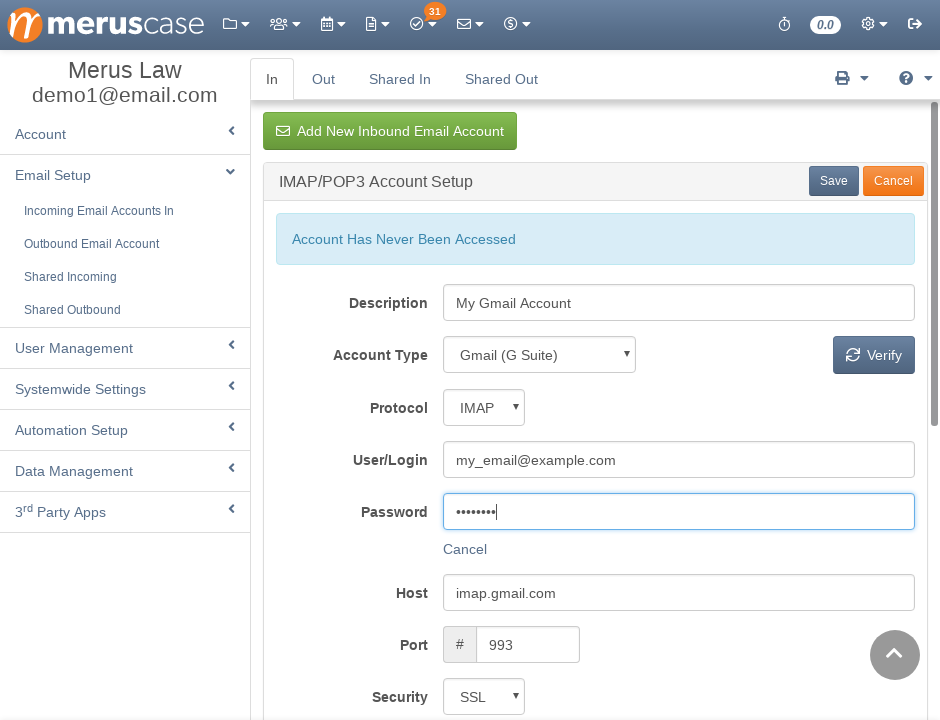
User/Login: Your email address. Note that there are some circumstances in which your User/Login information will not be your email address. Please contact your local IT resources to confirm these settings.
-
Password: Click Set/Change to enter the password for your email account, not for your MerusCase account (unless you’ve set them to be the same).
-
Host, Port, and Security: These settings are to be confirmed with your local IT resource.
-
-
Now that you’ve entered all of your info, click Verify. If your settings are correct, you will receive a notification that says Verification Succeeded. MerusCase will now retrieve mail from your external account every few minutes.
-
Click Save to save these credentials.
-
Finally, under Synchronization Options, click Change to select your preferred options for Synchronize This Folder and Move Deleted Items To. The options available under these dropdown menus will depend on your email provider and the folder structure in your primary email account. The Synchronize This Folder setting will determine which folder from your email account will be synced with your Merus inbox. Moved Deleted Items To will determine what happens to emails in your email account when they are deleted from MerusCase.
Note for Gmail users:
Google has several layers of additional security. If you’re encountering authentication errors, follow the steps below.
-
Log into your account via Google’s Display Unlock Captcha.
-
In Gmail, navigate to My Account > Sign in & Security > Device activity & notifications. There, confirm any blocked sign-in attempts or devices as performed by you.
-
Navigate to the Less Secure Apps section via this link, and set Allow less secure apps to ON.
-
Lastly, you’ll want to enable IMAP in your Gmail settings by opening Settings > Forwarding and POP/IMAP > IMAP Access and selecting Enable IMAP.
Note
If you are an Administrator in your firm's G Suite, you can globally change the setting for allowing Less Secure Apps for all of your firm's users.Delete
If you ever want to unlink an email address from a MerusCase account, you can simply click the Delete button associated with the email address you want to remove.
For users encountering an error indicating that there were too many failed attempts to access an email account, you’ll want to confirm that you have the correct credentials; try logging into the email account directly to make sure. If you have the right credentials but are still getting this error, then try the steps in the below note first. If they don’t work, use the Delete button to wipe the email account from the tab to start over.
Note
If you're experiencing issues with your email sync, there are two important troubleshooting steps to follow before resorting to deleting and re-entering your sync setup.1. Ensure that you have as few emails stored in MerusCase as is reasonably possible. Remember that emails linked to a case are stored in that case's Activity tab and thus can safely be deleted from your inbox and Sent folders.
2. Verify your settings again. To do so, simply click Set/Change by the password field and re-enter your current email account password. Then, click Verify and click Save. If you're still encountering errors with your sync, you should move on to deleting the sync setup and re-entering it.
Outgoing (User & Shared)
MerusCase also allows users to send emails from an external email address, such as [email protected]. Multiple private and shared outbound accounts can be synchronized to your MerusCase account. When composing an email, these accounts will be available to choose from in a drop-down menu in the From field of the message.
To set up an outbound email account, follow the steps below.
-
Click on Tools & Settings on the top right-hand corner of the screen.
-
Click Email Setup and then click on the Outbound Email Account tab.
-
To add a Shared Outbound email account instead, click on the Shared Outbound tab.
-
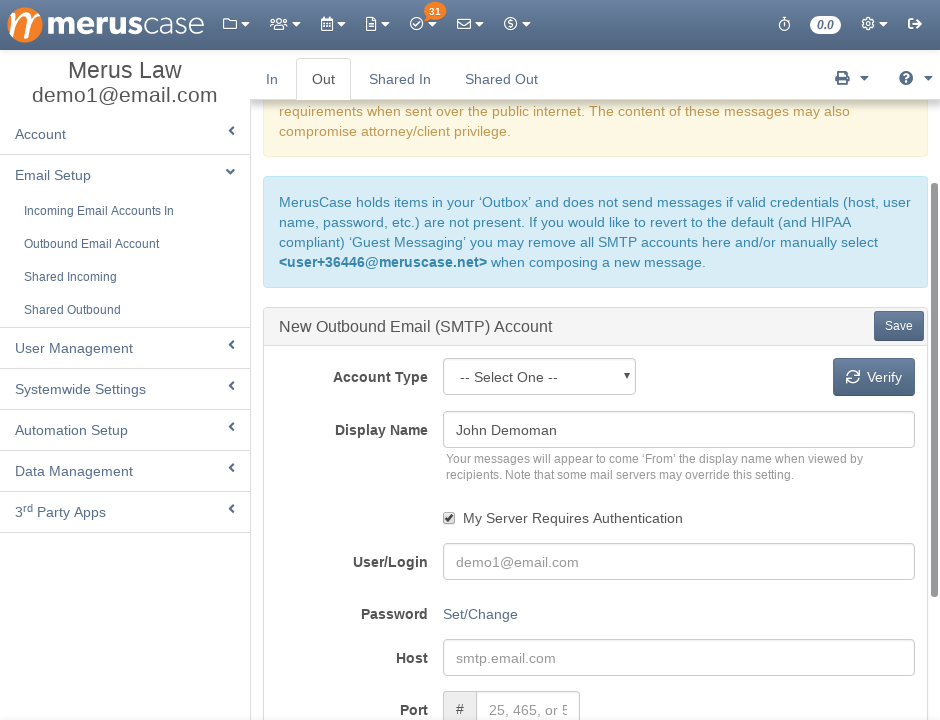
Click Add New Outbound (SMTP) Email Account to add a new email address.
Edit, Verify & Save
-
Enter the info and credentials for the email account you’re syncing.
-
Account Type: This will fill in default settings for Port and Security; these may or may not need to be adjusted.
-
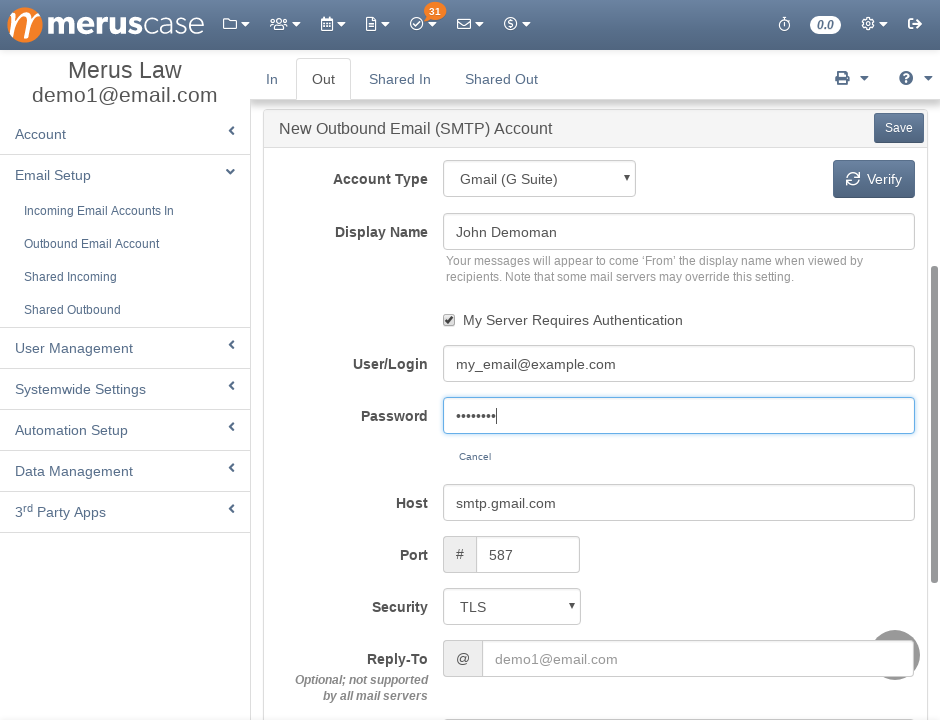
Display Name: The name which recipients will see in the From field. Note that some mail servers may override this setting.
-
User/Login: Your email address. Note that there are some circumstances in which your User/Login information will not be your email address. Please contact your local IT resources to confirm these settings.
-
Password: Click Set/Change to enter the password for your email account, not for your MerusCase account (unless you’ve set them to be the same).
-
Host, Port, and Security: These settings are to be confirmed with your local IT resource. Note that these settings will be different from those entered for incoming email accounts.
-
Reply-To: If your mail server supports this feature, then the email you set here will be the reply-to email. In other words, when you email someone, their response will be sent to the email here in the Reply-To field.
-
Linked Incoming IMAP Account: Choose the account in Incoming Email Accounts that this outbound account corresponds to.
-
Synchronize Sent Items to: Set the folder in your primary email account that emails sent within MerusCase will appear in. For example, if this is set to Sent Mail, then emails you send in MerusCase will sync to your primary email account’s Sent Mail folder.
-
-
Click Verify. If your settings are correct, you will receive a notification that says Verification Succeeded. A test message was sent to (your email) using the SMTOP server credentials provided.
-
Click Save to save these credentials.
Email Signature
Set up your email signature in MerusCase via User Preferences.
-
Navigate to Tools & Settings (the little gear icon in the upper-right) and select My Preferences.
-
Scroll down to the External Notifications & Email Messages section.
-
Type in or paste in your desired email signature in the Signature textbox.
-
Scroll back to the top of the page and click Save.
The next message composed in MerusCase will now have that email signature set.