Logging Time in MerusCase
There are several different ways to log time within MerusCase, such as via the Global Time Tracker, from within Case Details, a Message, or a Contact, as well as through the Activities tab of a Case. All logged time will appear as case ledger items - the fundamental building blocks of bookkeeping in MerusCase.
Logging Global Time Tracker Entries
The main method of logging a time entry is through using the Global Time Tracker tool, which can be universally accessed no matter where you are within the MerusCase system. Best of all, the time charges recorded through the Global Time Tracker are done so through a popup, which means that you’ll never have to click away from your current window in MerusCase to quickly log time.
-
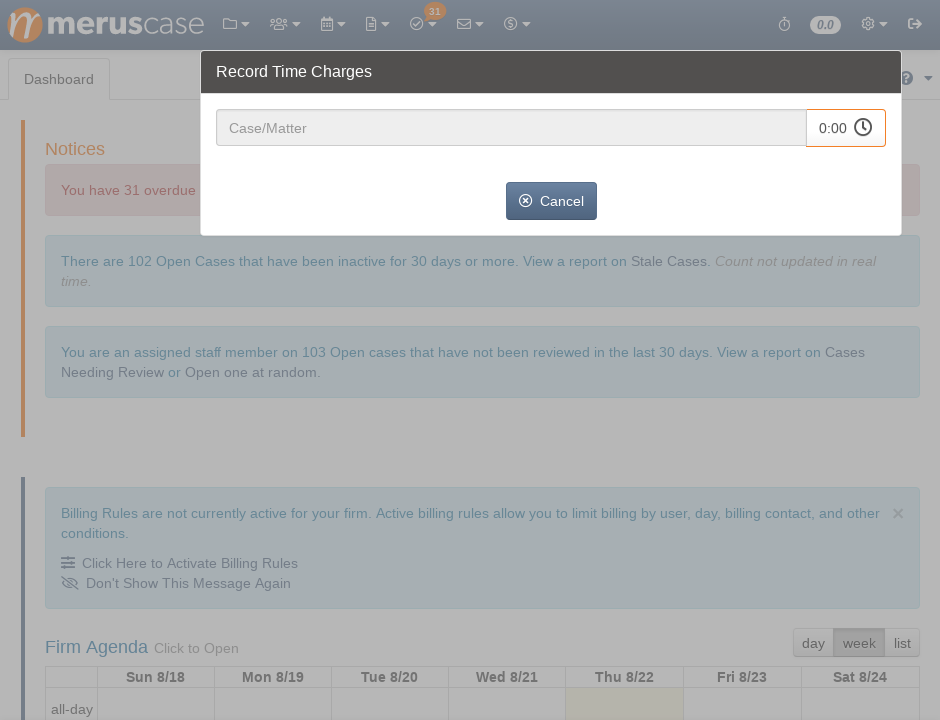
Click on the Global Time Tracker icon in the upper-right-hand corner of MerusCase. From here, the Record Time Charges interface will pop up and the timer will begin. You can click on the Pause/Play button next to the timer to stop or start the timer at any time.
-
To record a time charge for a specific case, you will need to search for the case in the Case/Matter field. Once you have found the case you’re looking for, click on it to populate the Case/Matter field. If you are already in a case, the Case/Matter field will be populated with the name of the case you are currently viewing. If you would like to change the Case/Matter, you can easily erase the name of the Case/Matter that has been entered.
-
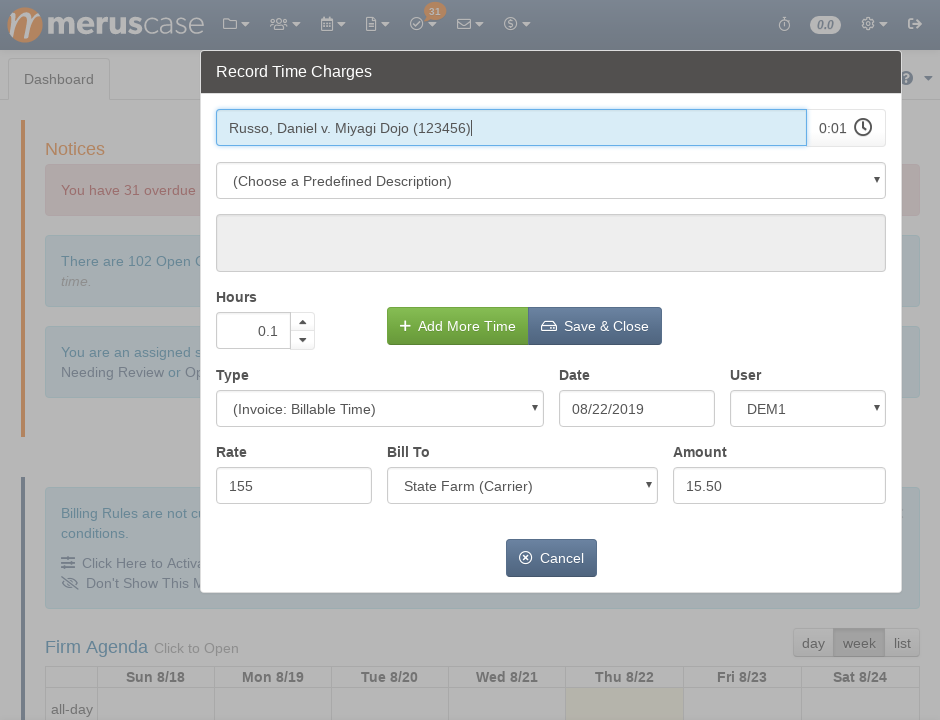
Next, you’ll need to enter a billing description. For this, you have 2 options: (1) choose a Predefined Description or UTBMS Code, which can be setup from the Systemwide Settings interface, or (2) manually enter a billing description within the blank field on the popup. The billing description that you enter will be displayed on both the case ledger and the invoice when it is sent to the client.
-
If you would like to manually enter the number of hours you are billing for on this time charge, click on the up and down arrow buttons or type in the number in the Hours field.
-
From here, you’ll need to select the Type of time charge. More often than not, this field will be set as Invoice: Billable Time, but you can also use this interface to invoice for fees, apply payments received, and more.
-
The Date, User, Rate, Bill To, and Amount will be automatically pulled into their corresponding fields based on the active user recording the time charge as well as the Case/Matter you have selected. If you would like to manually adjust any of this data, you can do so using the available fields.
-
After you have filled out all necessary fields, you have 3 choices: (1) click Save & Close to save this time charge and exit the Record Time Charges interface, (2) click Add More Time to save this time charge and enter an additional time charge, or (3) click Cancel to completely cancel out of this time charge.
-
The logged time entry/entries will now appear in the corresponding case’s ledger. For more detailed information on the case ledger, please see our Case Ledger documentation.
Note
You can disable the automatic timer on new time charges firmwide by unchecking Show Time Tracking Options by Default in Accounting Setup.Logging Time Entries from the Activities Tab
Logging time charges within a case’s Activity Tab makes it easy to log activities and bill your clients for those activities in one fell swoop. No double entry required! Just follow these 4 simple steps:
-
Within a case’s Activity Tab, click on the New Activity button.
-
Please review the documentation on Adding a New Activity for more information on logging an activity.
-
To add time charges for this activity, click on the arrow to the right of the text that says, Record Time Charges for this Activity. If time tracking is displayed by default in Accounting Setup, time charges will automatically begin when logging a new activity.
-
From here, you can record time charges according to the same steps outlined in the Logging Global Time Tracker Entries section. The recorded charges will then appear in the corresponding case’s ledger.
Logging Time Entries from the Contact Details Tab
You can log time charges from any Contact Details tab using the Log Call button that appears near the Communication section of a contact’s details. This is especially helpful for instances in which you would like to quickly bill a client for a phone call and run the timer as you are on the phone. To do so, follow these 3 steps:
-
Click the Log Call button. This will pull up the New Case Activity interface. Please view our Logging an Activity documentation for more information about this feature.
-
To add time charges for this activity, click on the arrow to the right of the text that says, Record Time Charges for this Activity. If time tracking is displayed by default in Accounting Setup, time charges will automatically begin when logging a new activity.
-
From here, you can record time charges according to the same steps outlined in the Logging Global Time Tracker Entries section. The recorded charges will appear in the corresponding case’s ledger.
Editing Logged Time Entries
If you need to edit a logged time entry for any reason, you can do so through the case ledger.
-
Navigate to the case that you wish to edit a time entry for.
-
Click on the Ledger tab and select Operating Account & Time Tracking from the dropdown menu.
-
Click on the row containing the time entry that you would like to edit. All editable fields will popup in the right panel.
-
Make any necessary changes and click Save & Close. All saved changes will now be reflected in the case ledger as well as the My Time section of the user who originally logged the time.
Note
You can also edit a logged time entry via the My Time section of Books if the time entry in question was logged by you. If the time entry in question was not logged by you, you must edit the entry via the specific case's ledger provided you have sufficient user permissions. Additionally, it is important to note that ledger items are not logged in the Activity tab.Courtesy Time Tracking
If you enter time for another user in your firm (e.g. when transcribing a paper time sheet), then you’ll need to setup Courtesy Time Tracking in User Preferences. Setting up Courtesy Time Tracking allows the transcription to be billed as the attorney in the firm.
If the checkbox I enter time for other users is checked in user preferences, then User A (who enabled the setting) can log time for User B (who didn’t enable the setting) without a record of User A being involved in the creation of the time tracking item.
When the checkbox I enter time for other users is not checked in user preferences, both users will be displayed on the ledger item. If the time you enter for other users needs to be linked to you, then this option should not be checked.
The My Billable Time tab under Books displays all time logged by you, the current user, including all time logged for other people. However, when Courtesy Time Tracking is checked in user preferences, the time logged by the current user will not be displayed in My Billable Time.