Creating a New Case
To create a new case for your firm, navigate to Cases > New Case on the main navigation bar. Alternatively, you can also click on the New Case button from Browse Cases.
Upon clicking, the Add New Case view will appear.
Case Info Fields
The fields displayed are dependent on the Case Type chosen.
Note
The default case type, or the case type that is automatically chosen upon New Case creation, is customizable in User Preferences. So, if you always create Immigration cases within MerusCase, make sure your Default Case Type is set to Immigration in user preferences.-
Case Type: Select the desired Case Type from the available options.
-
Case Status: Refers to the current status of the case. The status can always be changed once the case has been created. By default, Merus assigns Case Status as Open.
-
Venue is Based Upon: Select from one of the dropdown options in order to indicate how the Venue for this case was determined.
-
Office: If your Firm has multiple firm branch offices, the various branches will be listed here. Select the appropriate branch. If you do not see the desired branch, refer to Firm Branch Offices to add a new branch.
-
Attorney Responsible: Refers to the primary attorney on the case. The Attorney Responsible can be changed from within the case at any point after the case has been created.
-
Date Opened: The date on which the case was initially opened. By default, it is set to today’s date.
Primary Party Fields
Pro-Tip
For all case types, you'll be prompted to enter the name of the party who initiated the action such as a plaintiff, petitioner, claimant, beneficiary, etc. The title of that initiated party is displayed based on the case type, meaning that if the case type opened is Immigration, Beneficiary will be displayed, whereas a Workers' Compensation case will display Applicant.Each field displayed does not need to be filled out on this screen as all the information is editable after case creation. However, in order to initially create the case a name must be entered. This allows the system to check for duplicates to help ensure that the same information is not entered twice and helps to check for conflicts.
If the initiated party is a company, check the Client is a Company option. By doing so, the fields will update to Company Name and the system will no longer prompt you for an SSN.
The option to Force creation of a new contact (do not check for duplicates) should be used sparingly, but can be necessary if you know that a contact with the same name exists within your firm’s rolodex and you want to ensure that MerusCase creates a new contact rather than match the current contact with a previously existing entry.
Pro-Tip
Curious about removing duplicate contacts within your firm's rolodex? Refer to documentation on Removing Duplicates for more information.If the primary contact is the billing party, select the checkbox Set Billing Party to Petitioner. This option will be displayed only on certain case types.
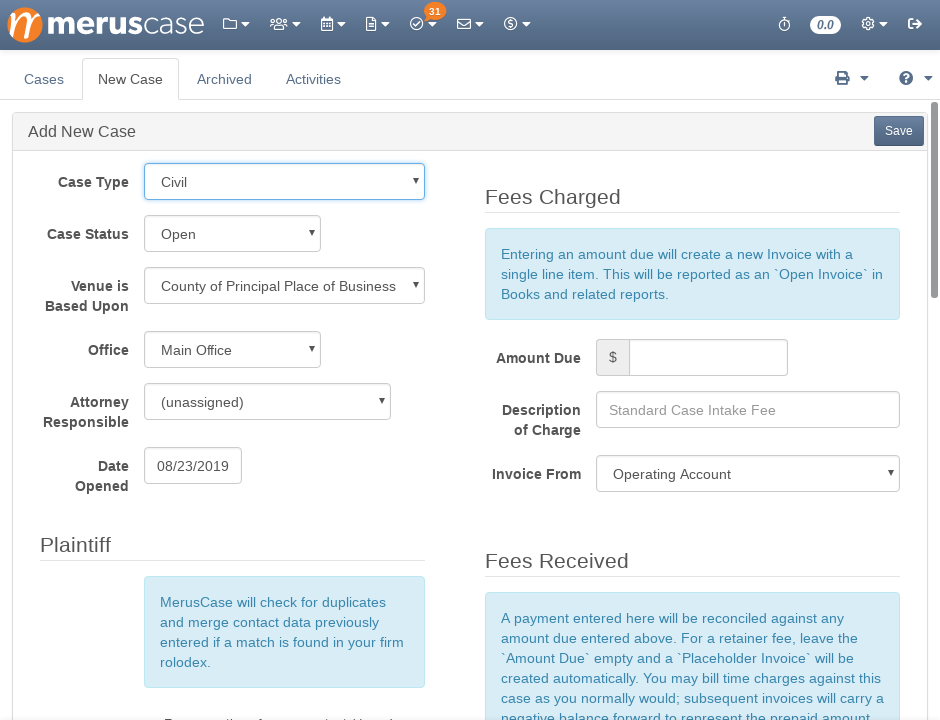
Fees
For certain case types, you will be able to enter initial billing information in the Fees section. This section will not be displayed in cases that are contingency based.
-
Amount Due: Entering an amount due will create a new invoice with a single line item. This will be reported as an Open Invoice in Books and related reports. For more information, refer to billing.
-
Description of Charge: Will be the description listed on the invoice
For some case types, you will be able to fill out the Fees Received while creating cases.
-
Amount Received: A payment entered here will be reconciled against any amount due entered in the Fees Charged section. You may bill time charges against this case as you normally would; subsequent invoices will carry a negative balance forward to represent the prepaid amount. Items entered here can always be adjusted from within the case later.
-
Check/Reference Number: Enter the check number for payment received.
-
Memo: Fill in what the Amount Received was for.
-
Other Description: Any other details relating to the fees received.
After all necessary information has been entered, click save. Once clicked, the user will be redirected to the Case Details page of the case he/she just created.
Case Type Specific Fields
Immigration Filing Packets
Immigration and Immigration with Removal case types have a special section called Filing Packets. These immigration-specific packets can be added at any time from the Immigration Tab as well as upon case creation, as detailed below.
-
Click on the dropdown next to “Select a Filing Packet” and select the desired packet.
-
Once you have selected the Packet, you will get a list of all Forms in the packet and also optional Forms.
-
Check the box if you want any of the optional Forms.
Once the new case has been saved, the chosen packet(s) will be available in the Immigration tab.
Note
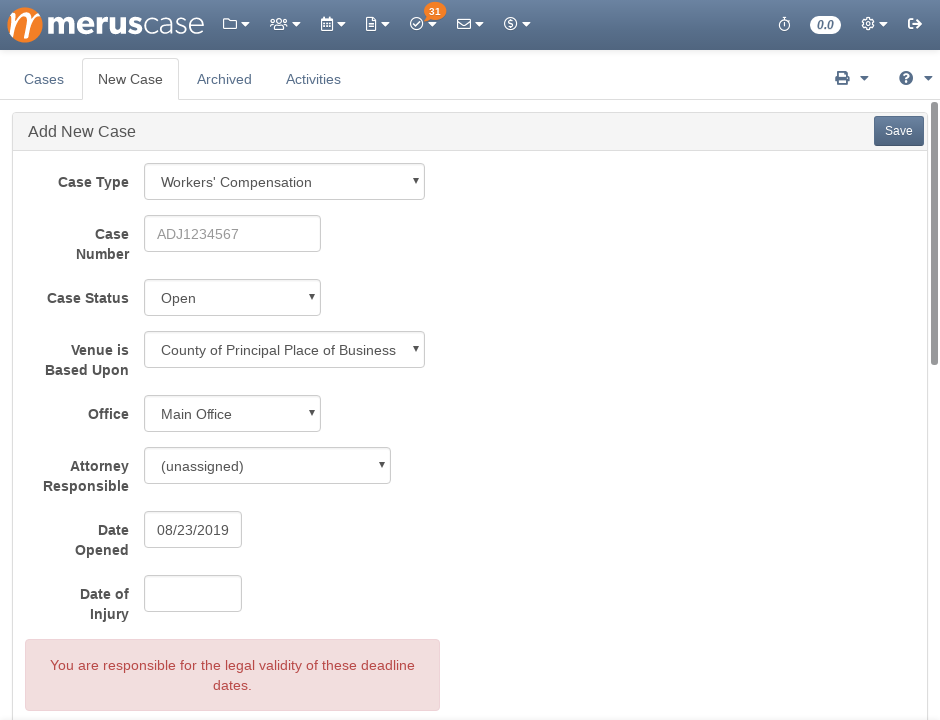
New Packets can always be added once the case has been created.Workers’ Compensation EAMS Import Tool
Use the EAMS Import Tool (commonly referred to as ADJ Import) to save a great deal of time and effort by automatically pulling info such as applicant, party, and injury data from the California Division of Workers Compensation EAMS website for a Case Number that has already been assigned..
Pro-Tip
This feature is especially useful for Workers' Compensation defense firms as well as any firm that is subbing in on a case.To import EAMS data, simply type in the ADJ number (e.g. ADJ1234567), wait for the information to load on your screen, review the information and make sure Import this data into my case is checked, then click Save. Upon clicking save, your case will be created and the EAMS data will be imported into your MerusCase casefile.
Additional fields for the ADJ and S&W Filing Deadline will be displayed. These dates will be automatically filled in with today’s date by default. Please note that this is just a suggestion and that You are responsible for the legal validity of these deadline dates.